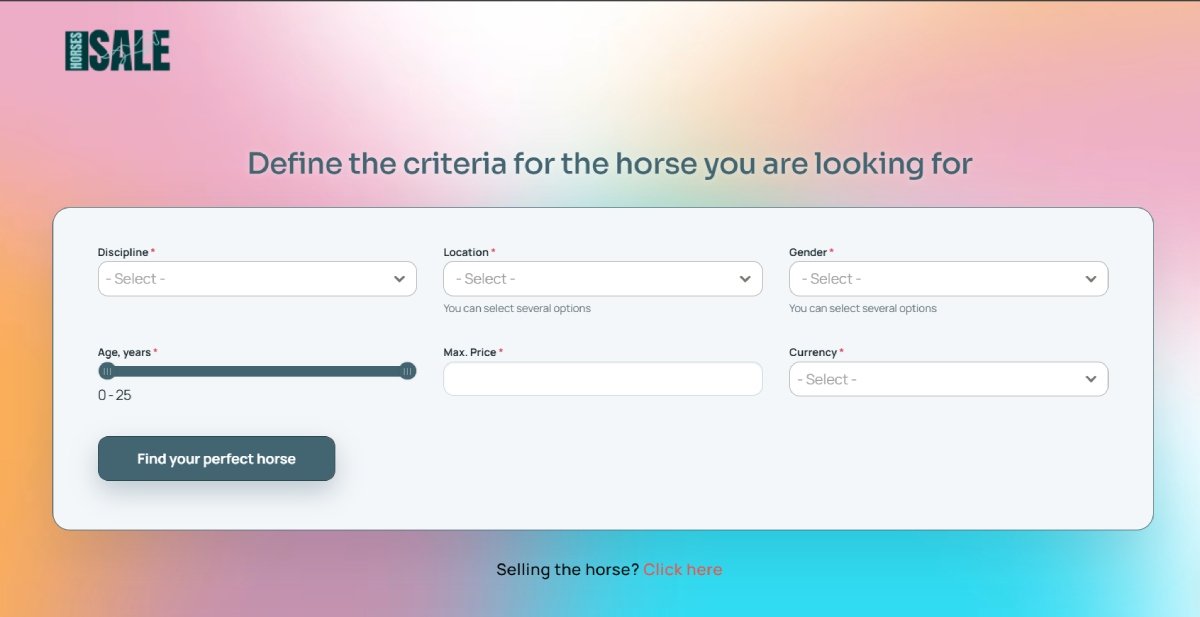
Buying a Horse

Getting Started

HORSES.SALE is a request-based service. This means the buyer’s first step is to select the horse’s requirements.

  1. Select the discipline. Dressage and Jumping are currently available.
  2. Select the country where the horse should be located. Several options can be chosen.
  3. Select the preferred gender(s) of the horse.
  4. Choose the age range.
  5. Specify the maximum price, including the currency. 

Once you specify all the requirements, click the “Find your perfect horse” button.

On the horse results page you can select one of three options.

Option 1. Search results. After clicking the “View matching horses” button, you’ll be redirected to the horses listings. Filters will be set up according to your requirements. You can modify them if needed. Learn more.

Option 2. Receive notifications. If you choose the “Stay up to date” option, you can not only see the current offers but also receive notifications about new arrivals. Learn more.

Option 3. Create an account. Having a free account on HORSES.SALE gives you full control over your requests and notifications, as well as access to additional services. Learn more.

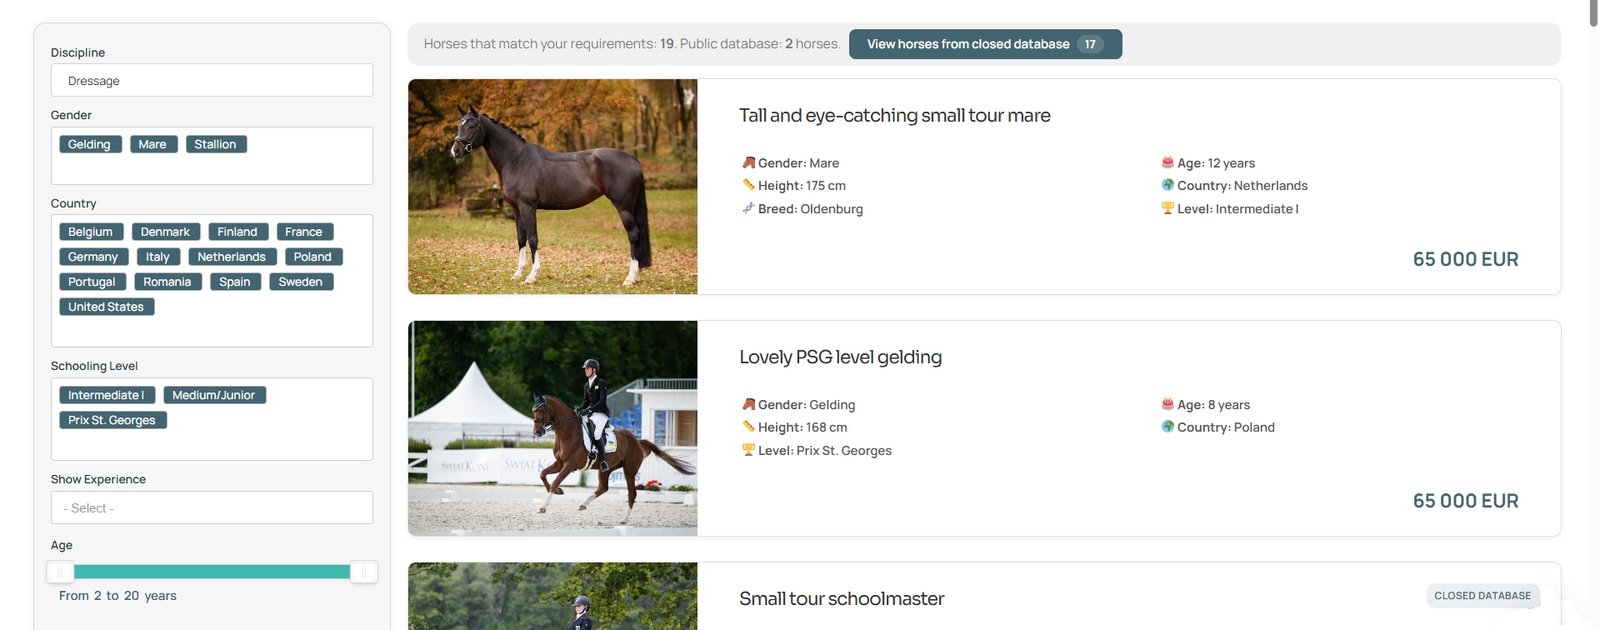
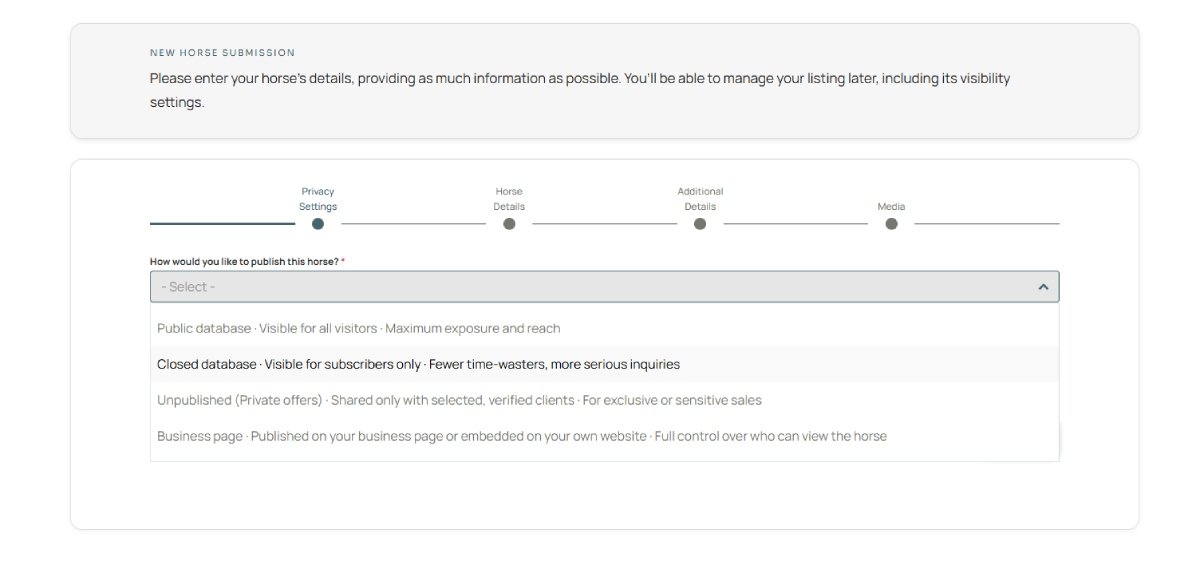
Database: Public and Closed

HORSES.SALE functions as both a curated horse sales agent and an online marketplace. All horses in our private marketplace are manually selected to ensure the best possible balance between quality and price. Buyers communicate directly with verified sellers, and no commission is charged on completed sales. When we act as a sales agent, we work on commission terms.

To access the database, fill out the details of the horse you are looking for on the homepage, and click the “View matching horses” button on the next screen.

Depending on the seller’s listing privacy preferences, the horse can be listed in a Public or a Closed database. In every database, each listing includes detailed information about the horse, a video presentation, and direct seller contact details.

If you don’t have a subscription with HORSES.SALE, you can see only the Public database listings. If you have the subscription, offers from both the Public and Closed databases are available for you. Learn more about purchasing the subscription.

The number of available horses for every requirement is displayed at the top of the catalogue page.

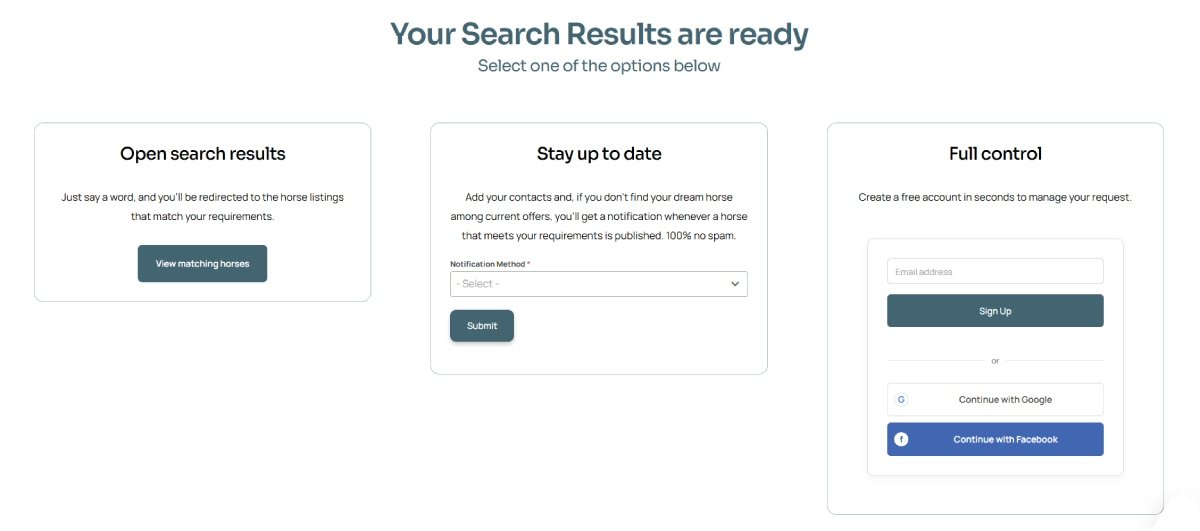
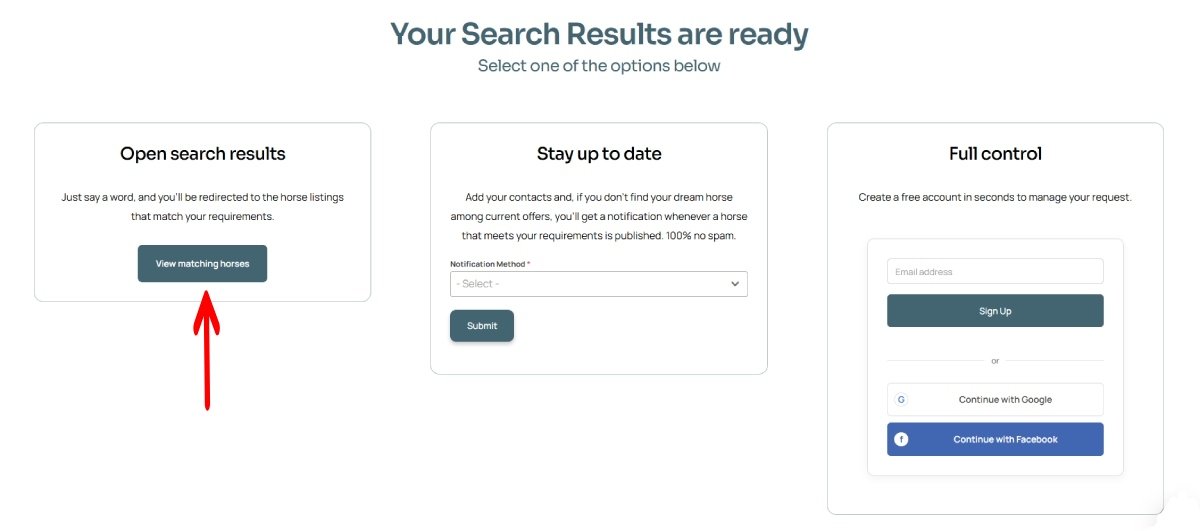
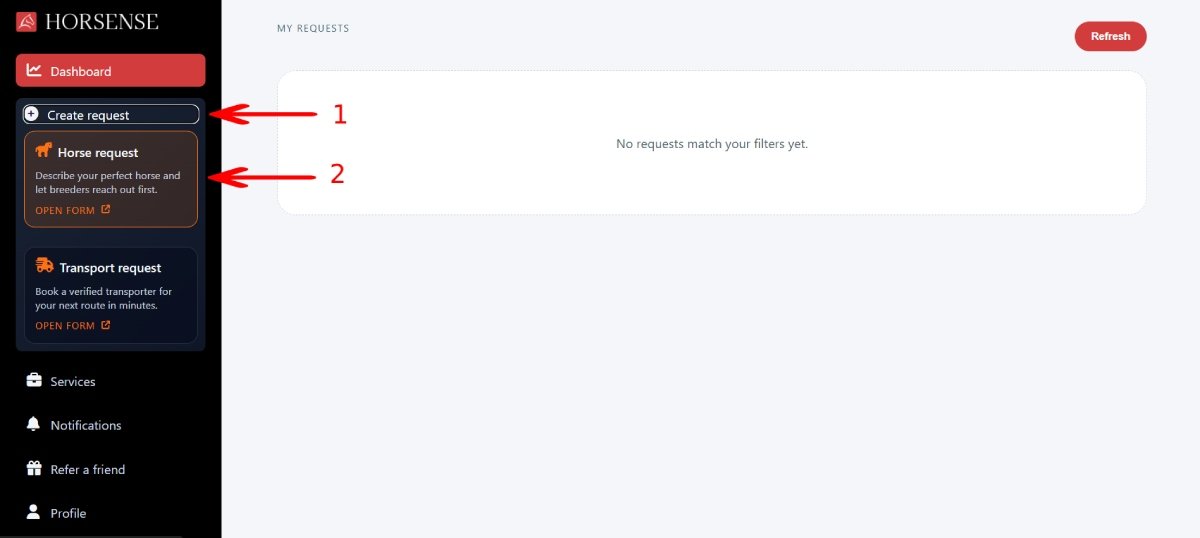
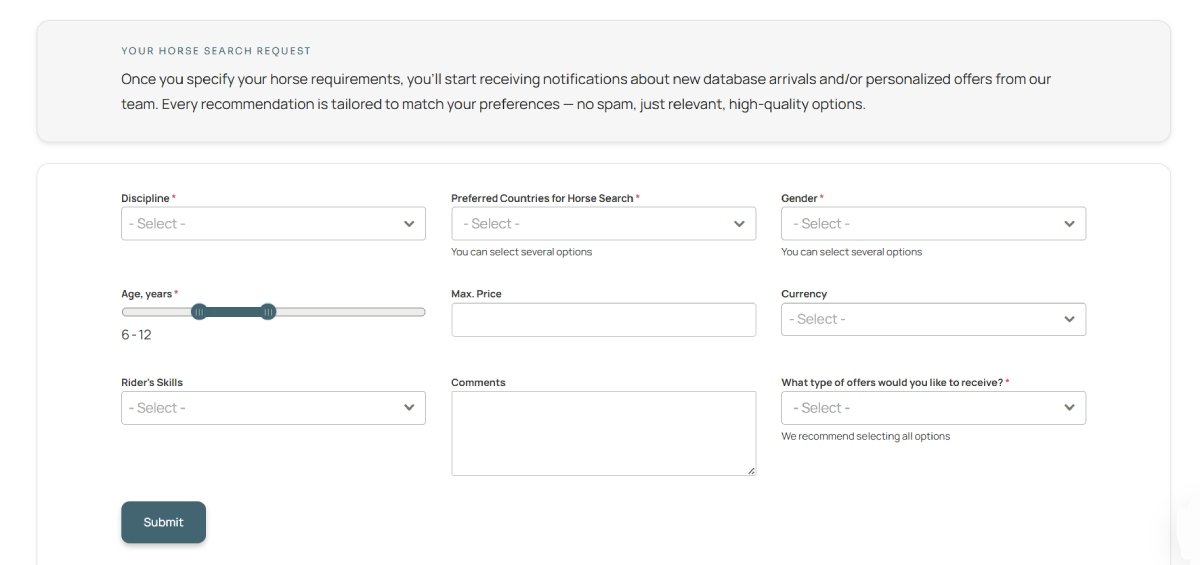
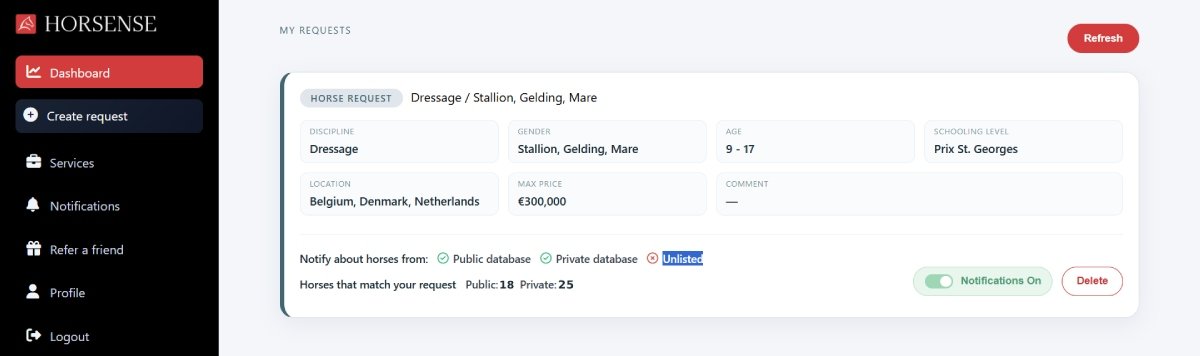
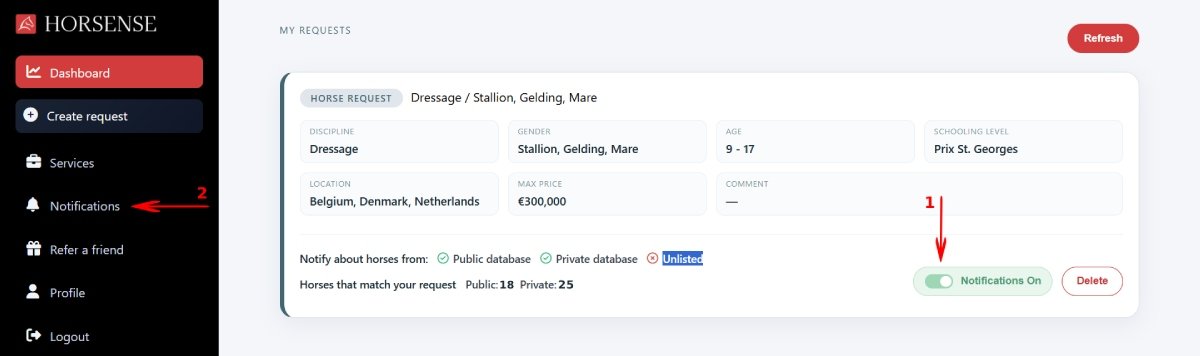
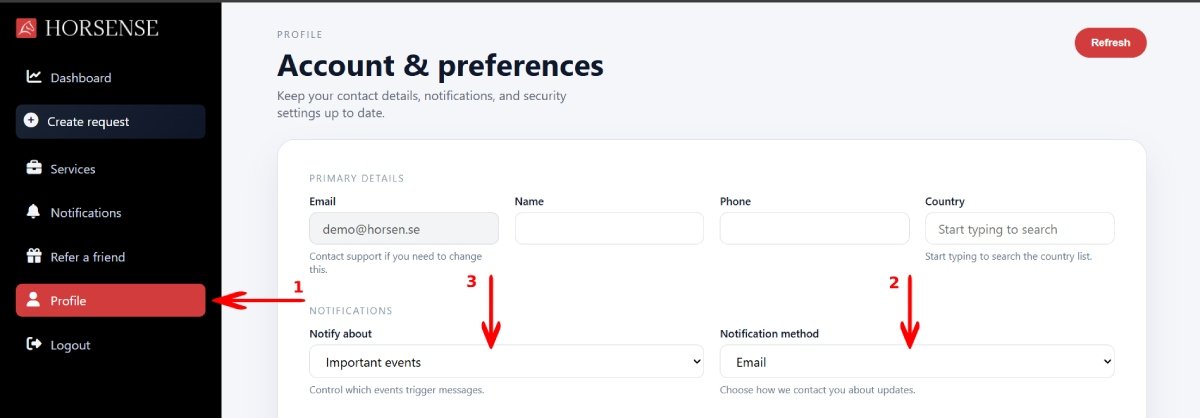
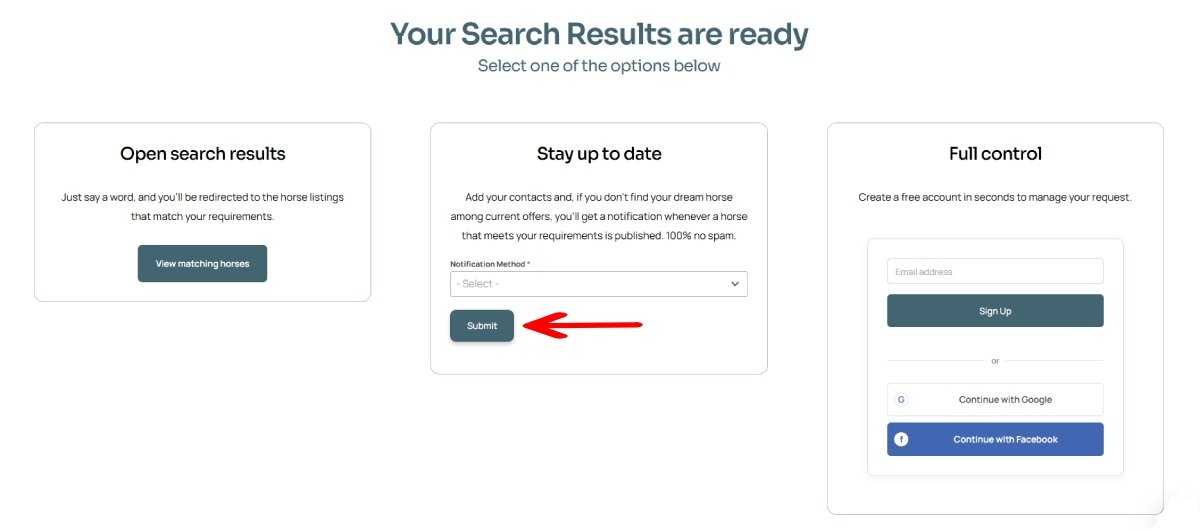
Search Request Notifications

You can create a free horse search request directly on the HORSES.SALE website. Before creating your request, you may optionally sign in or register. HORSES.SALE supports quick authorization through Google and Facebook, allowing you to complete registration in just a few seconds. Although registration is not mandatory, creating an account is recommended to give you better control over your requests.

Once the request is active, you will receive sms or email notification (depending on your choice) once the new horse that meets your requirements appears on our website.

Option 1. Create and manage request as a registered user

Step 1. Create a free account on https://horsen.se by clicking the “Sign Up” button. For the registration, you can use your email or a Google/Facebook account.

Step 2. In your account, click the “Create request” tab (1) and then click on the “Horse request” box (2).

Step 3. Fill out your horse requirements and click the “Submit” button.

Once your request is created, you can see it on your user’s dashboard.

You can manage your notification preferences for the specific request or for all active requests.

To disable notifications for the specific request, click on the “notifications” toggle (1) to change the status. Once notifications are disabled, you won’t receive messages to your email or phone, but still will see them in your account (2). 

To change notification settings globally, open the “Profile” section (1). Here you can change the Notification method (2) or disable notifications completely (3).

Option 2. Create a request without registration

To create a horse request without registration, fill out the details of the horse you are looking for on the homepage, and select the “Stay up to date” option on the next screen.

To stop receiving notifications, follow the “unsubscribe” link in any email or sms notification you receive.

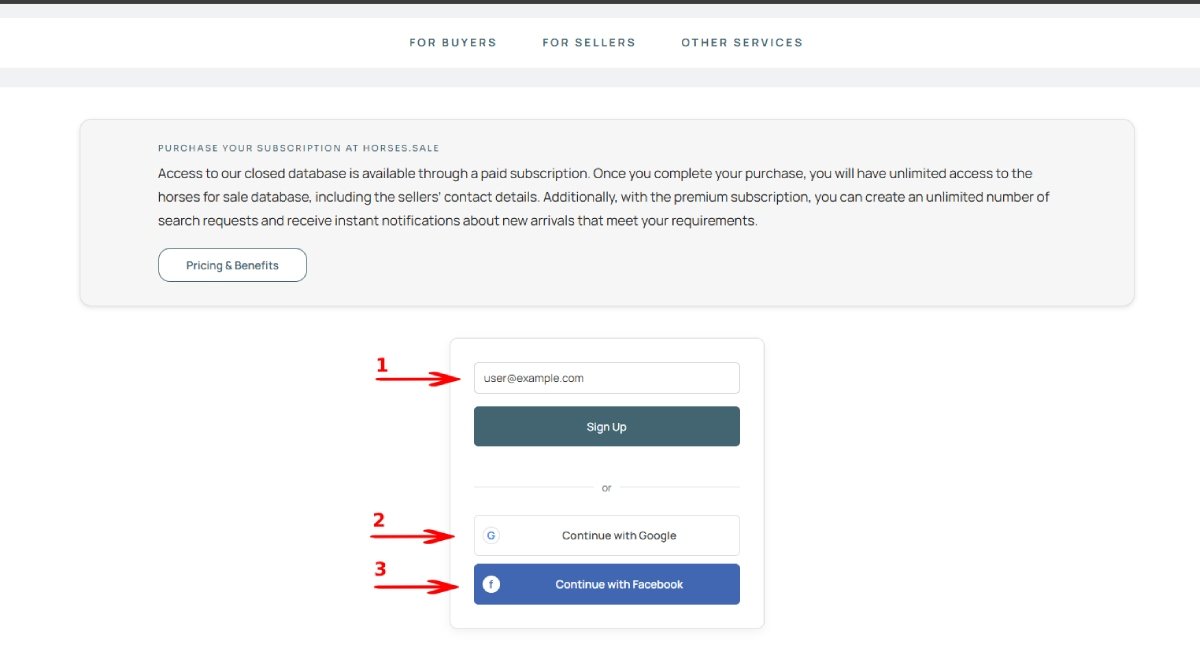
Purchasing a Closed Database Access

HORSES.SALE offers time-limited access to the closed database. During the active subscription period, you can view all listings in full, including detailed information about each horse and the seller’s contact details. Access can be purchased for 3, 90, or 180 days. Full pricing information can be found here.

Step 1. Open the database of horses for sale. On the top of the page you can see the total number of horses in the Closed database according to the selected filters. Click the “View horses from closed database” button.

Step 2. Create your account. Use your email (1) for the registration or sign up with your Google (2) or Facebook (3) account.

Step 3. Select the preferred subscription period, then enter your credit card details for payment.

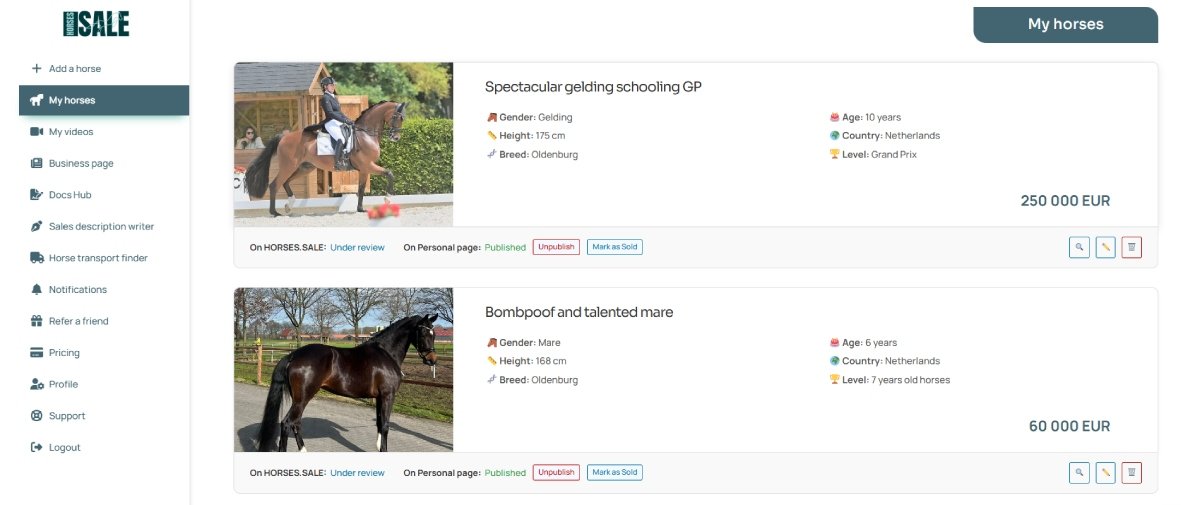
Selling a Horse: Database
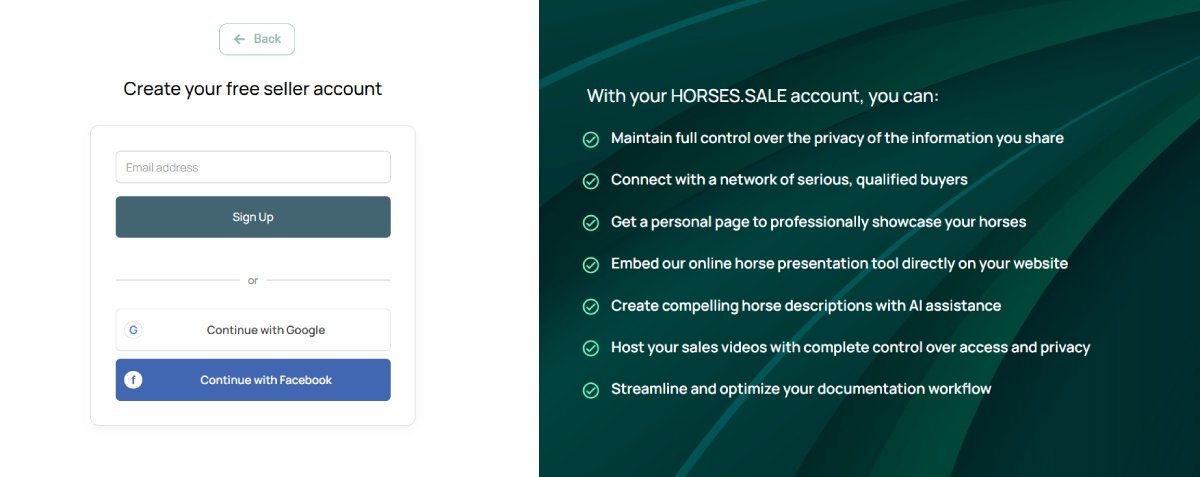
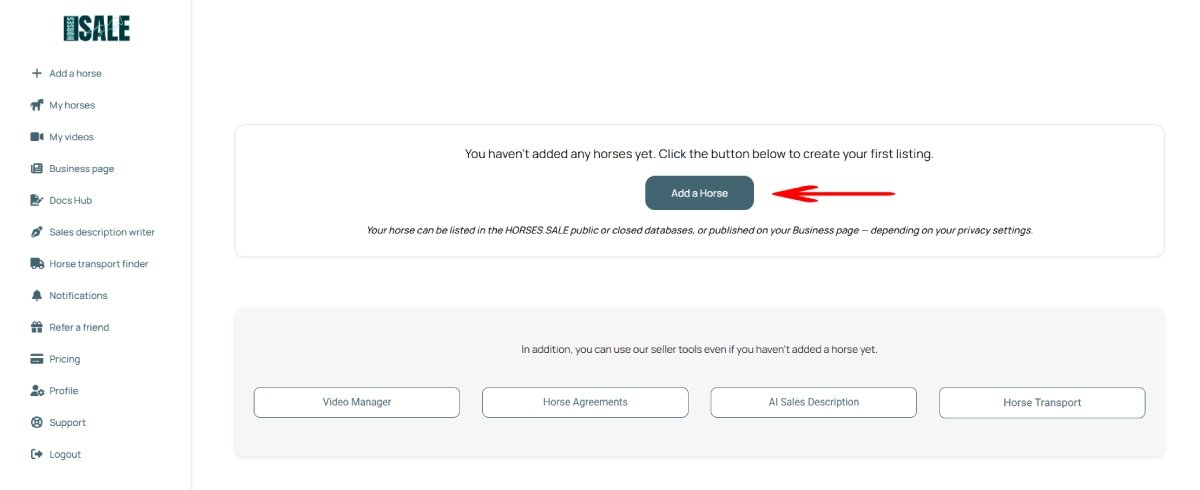
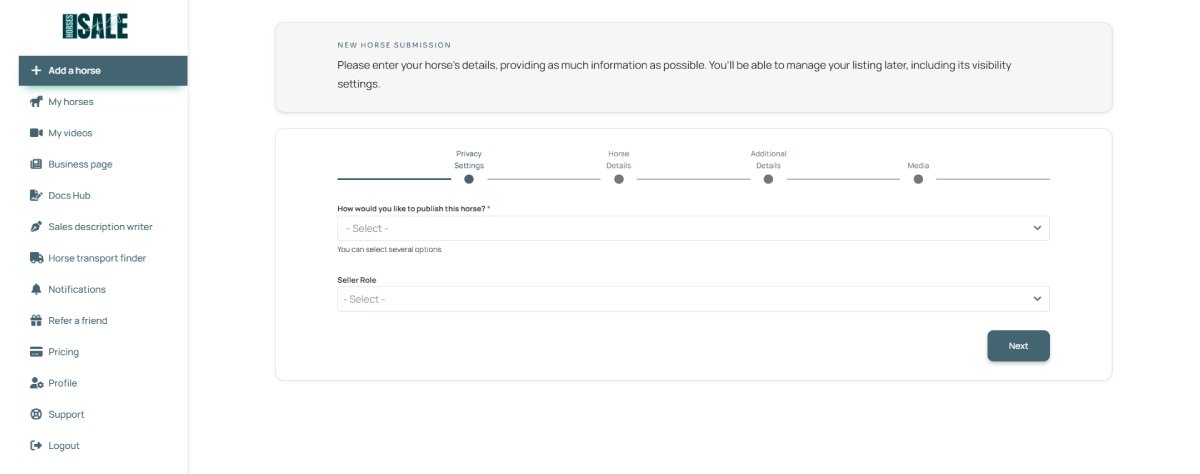
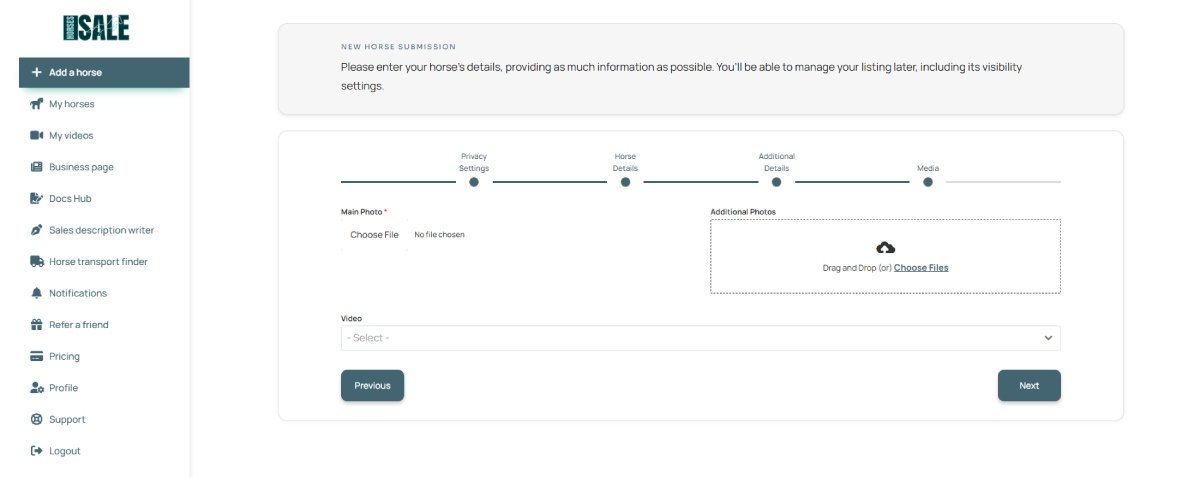
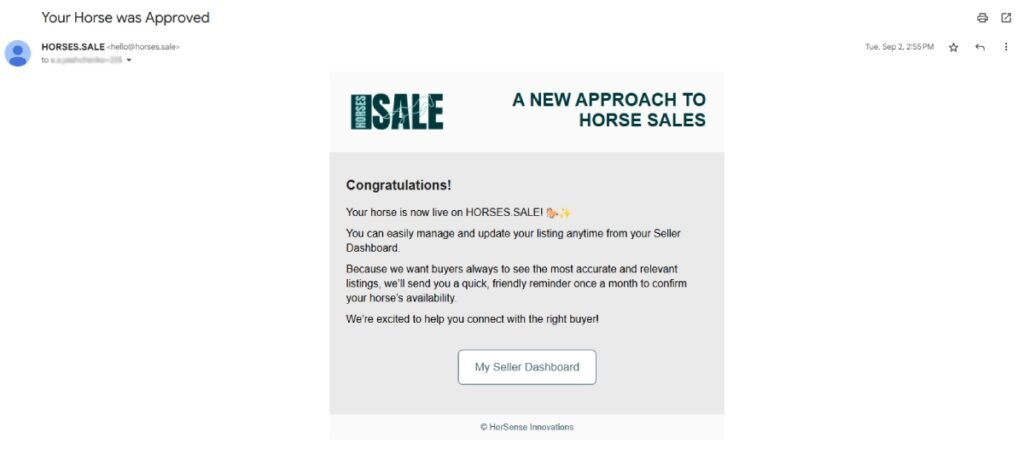
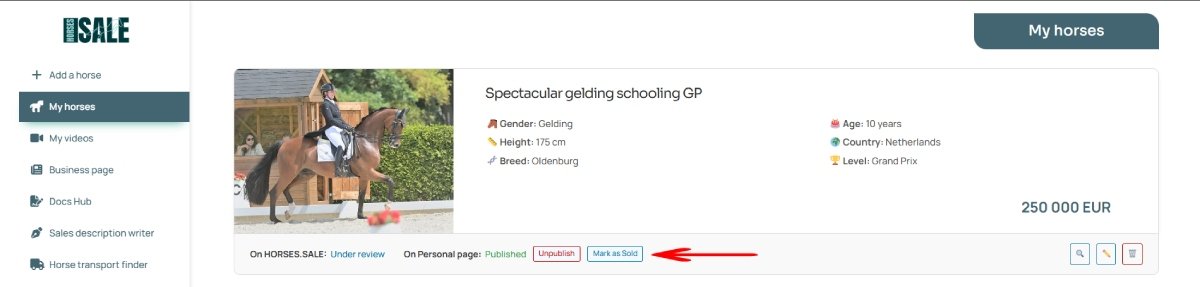
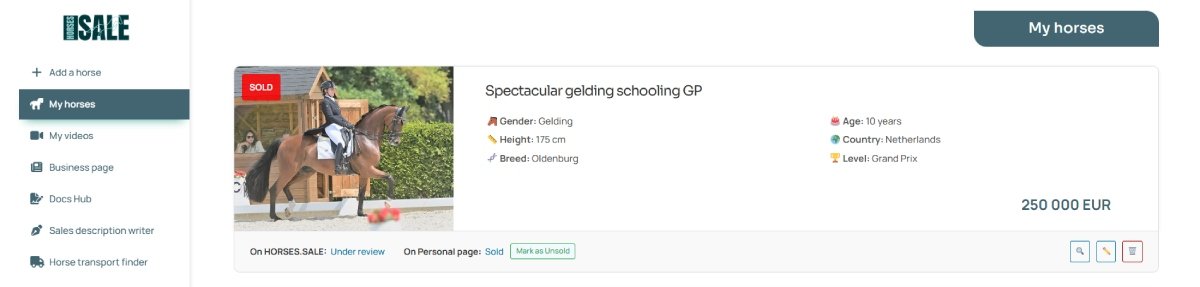
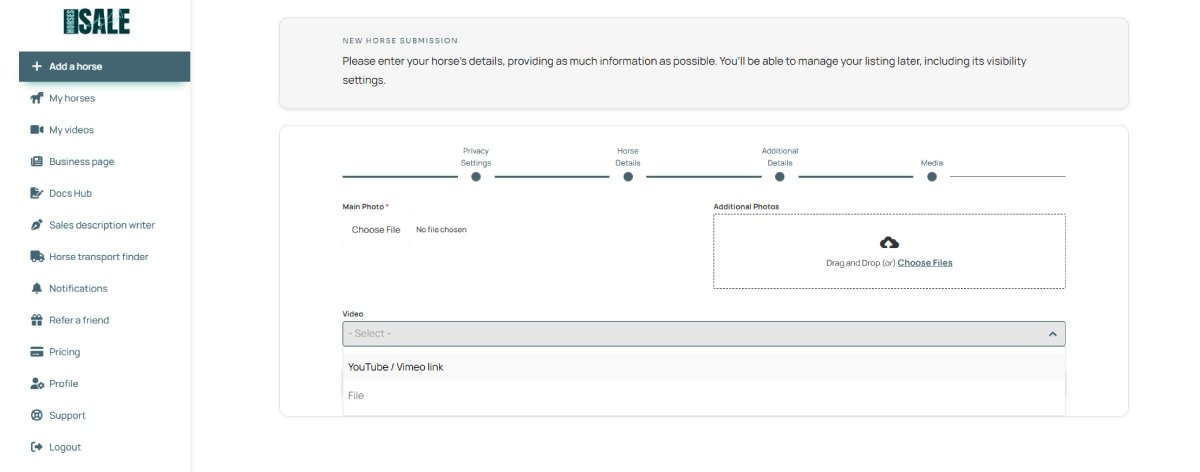
How It Works

With HORSES.SALE, you can publish your horse for sale with different privacy settings depending on your strategy. It can be listed in the Public database with maximum reach, in Closed database with serious buyers access only, or leave it unlisted but offer for Private sale: for selected buyers only.

In addition to database listings, HORSES.SALE offers several tools for sellers, including a personal page, a video manager, and other utilities that help you manage and present your horses effectively. These tools are available free of charge, regardless of whether you publish your horses on the HORSES.SALE platform or use them independently.

With HORSES.SALE, you can maintain the right balance between visibility and discretion. The platform allows you to present your horse professionally to interested buyers while protecting its reputation and controlling who can view the listing. HORSES.SALE helps you connect with the right buyers efficiently and securely.

Submitting a Horse

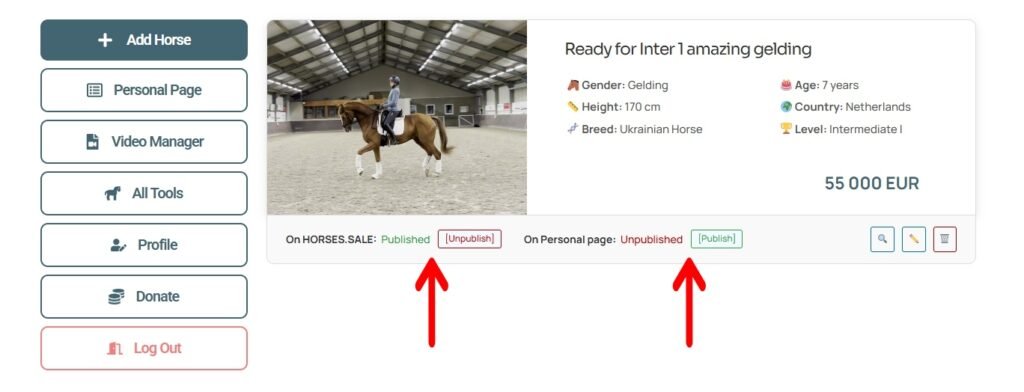
Whether you want to list your horse for sale through HORSES.SALE or simply use the Personal Page feature, the first step is always to create a horse listing.

Step 1. Create a seller account. Register a new account using your preferred username and password, or sign in quickly using Google or Facebook authorization.

Step 2. Click the “Add a Horse” button. 

Step 3. Complete the multi-step horse details form.

Step 3a. Configure your Privacy Settings according to your preferred level of visibility.

Step 3b. Fill out the main horse details.

Step 3c. Next, add additional details for your listing. To write a description, you may use our “AI description writer” tool. 

Step 3d. Then, add media files for your listing: main photo, additional photos, and video(s). If you don’t have any photos but only video, you may use our “photo from video” tool.

Step 4. Once you add your first listing, you need to specify the contact details that will be displayed to potential buyers.

Step 5. Review and manage your listing. Once your horse is added, it will appear as a card in your account dashboard. From there, you can edit or delete the listing, or adjust its privacy settings at any time.

Step 6. If your horse was submitted for inclusion in the HORSES.SALE database, its initial status will appear as “Under review.” Once our team approves the listing, the status will change to “Published,” and you will receive a confirmation email.

Privacy Settings

Each horse listing on HORSES.SALE can have different privacy settings. These settings are selected when submitting the horse and can be modified later at any time in the Seller Dashboard. Multiple privacy options can be enabled simultaneously, depending on the seller’s preferences.

Public Database

This option allows the horse to be presented to the widest possible audience. The listing is posted in the HORSES.SALE public database and is available for all visitors. Horse details can also be shared on our official social media pages.

Closed Database

When this option is selected, the horse is published in the Closed Database, which is accessible only to registered buyers with paid access.

Unpublished (Private Offers)

Selecting the Private Sales option ensures that the horse is not published publicly. Instead, HORSES.SALE may act as an intermediary to connect the seller with verified buyers. In these cases, a commission fee may apply to successful transactions, as agreed separately.

Business Page

This option publishes the horse on the seller’s business HORSES.SALE page, allowing the seller to easily share the listing link with potential clients or embed it on an external website.

Privacy settings can be changed at any time in the Seller Dashboard.

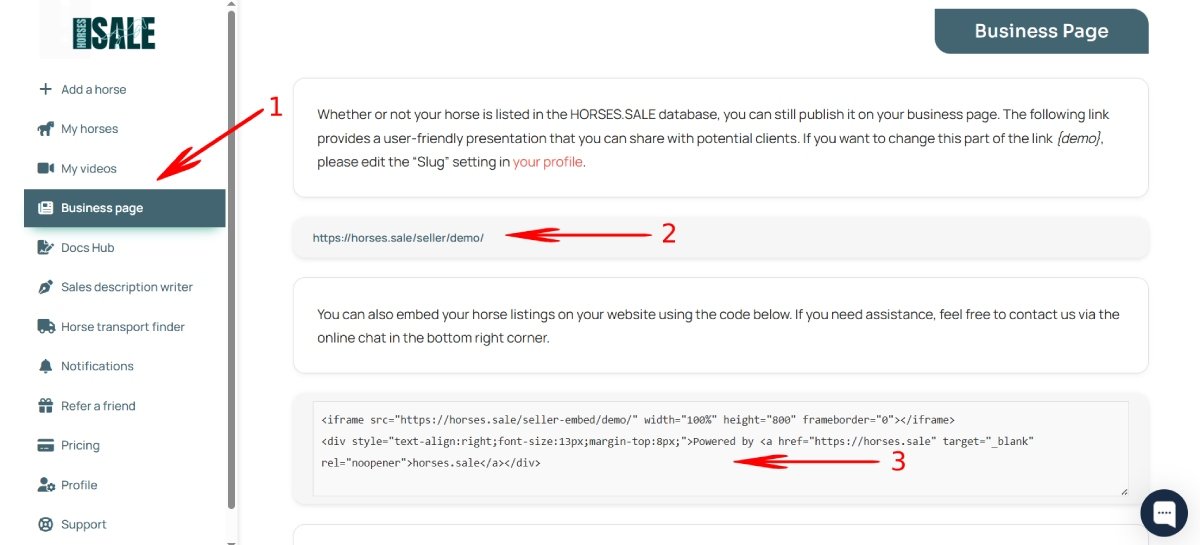
Selling a Horse: Business Page

Setting up a Business Page

A Business Page is your own webpage on HORSES.SALE, where you can present your horses online. It is completely free to use, contains no external links, and has no usage limitations. You can post your horses and share the link anywhere — on social media, in messages, or on your own website.

Step 1. Create a seller account. Register on HORSES.SALE using a custom username and password, or sign in quickly with Google or Facebook authorization.

Step 2. Add horses to your account. When submitting a horse, select the “Business Page” option in the Privacy Settings section. Only listings with this option enabled will appear on your business. For detailed instructions, see [Submitting a Horse].

Step 3 (optional). Mark horses as sold. If you want to display sold horses on your page, click “Mark as Sold” A “Sold” badge will appear on the horse’s main photo.

Step 4. Access your business page. To find the link to your page, open your Seller Dashboard and click the “Business Page” button (1). You can copy and share this link freely (2). Additionally, you can use iframe code to insert listings to your website page (3).

The list of your horses and their cards, with details including photos, videos, pedigree, etc., will be available for potential buyers.

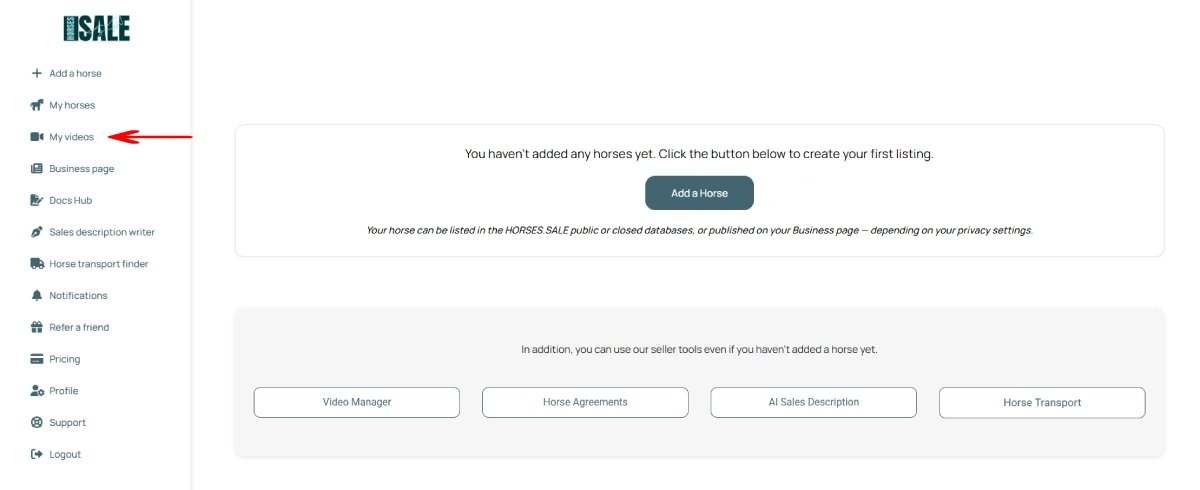
Selling a Horse: Video Manager
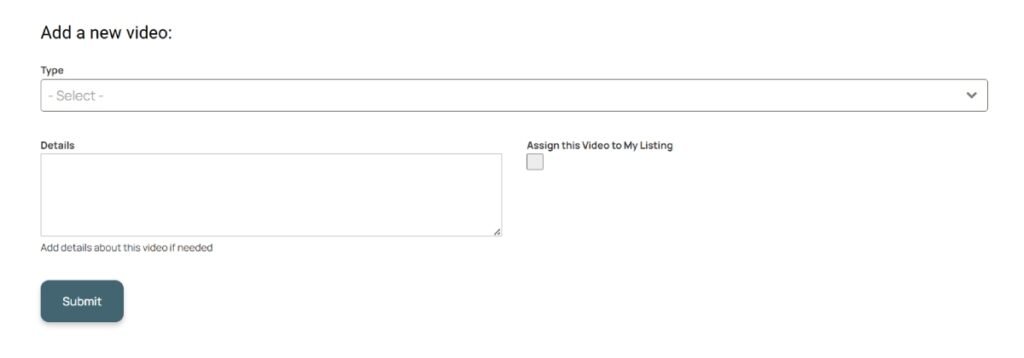
Uploading a Video

The HORSES.SALE Video Manager allows you to upload and manage horse sales videos, generate preview photos, set privacy options, and more. It can be used both for listings published on HORSES.SALE and as an independent tool. You can upload videos linked to specific horse listings or add them separately without creating a horse card.

Method 1: Uploading a Video for a Horse Listing

If you are submitting a horse to be published in the HORSES.SALE Closed Database or on your Personal Page, you can upload the video directly during the listing creation process.
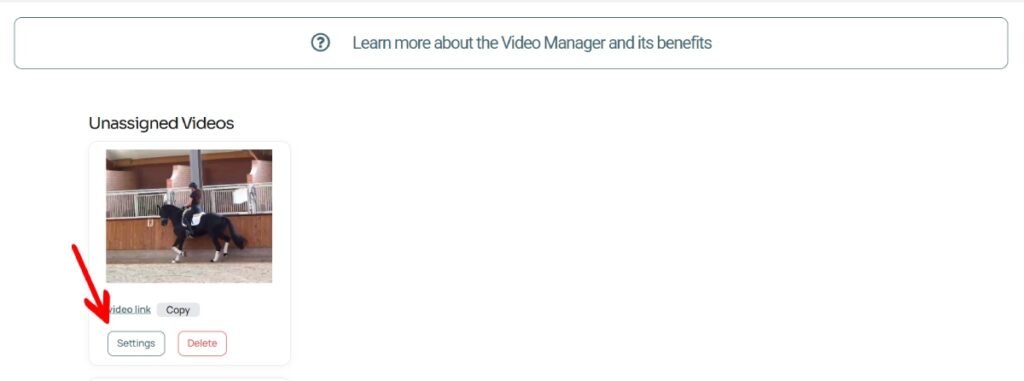
Step 1. Create a free seller account on HORSES.SALE using your email, Google, or Facebook authorization.

Step 2. Begin adding a new horse listing.

Step 3. On the last step of the form, select the “File” option in the Video field and choose one or more video files from your computer.

Step 4. Complete the remaining form steps. Once the listing is created, your uploaded videos will automatically appear on the horse’s page.

Method 2: Uploading a Video Separately

You can also use the Video Manager independently, without linking the video to a horse listing.

Step 1. Create a free seller account on HORSES.SALE using your email, Google, or Facebook authorization.

Step 2. In your Seller Dashboard, click the “My videos” button.

Step 3. Use the upload form to add one or several videos. These videos will be stored in your account and can later be attached to horse listings or shared separately.

Sharing a Video

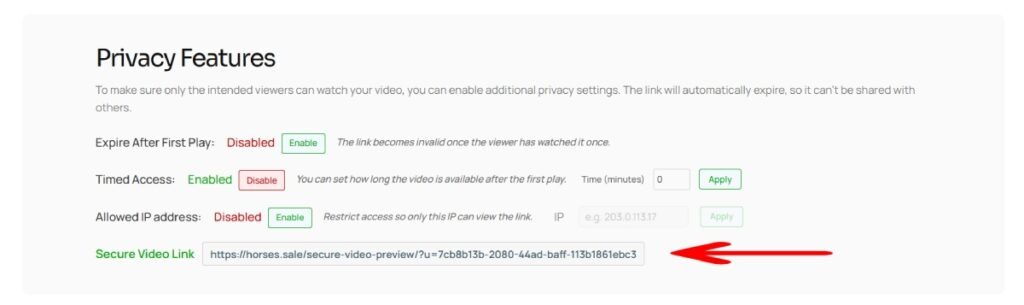
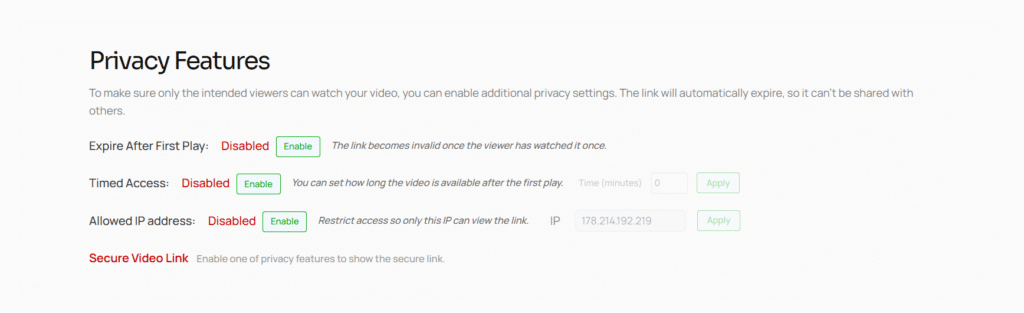
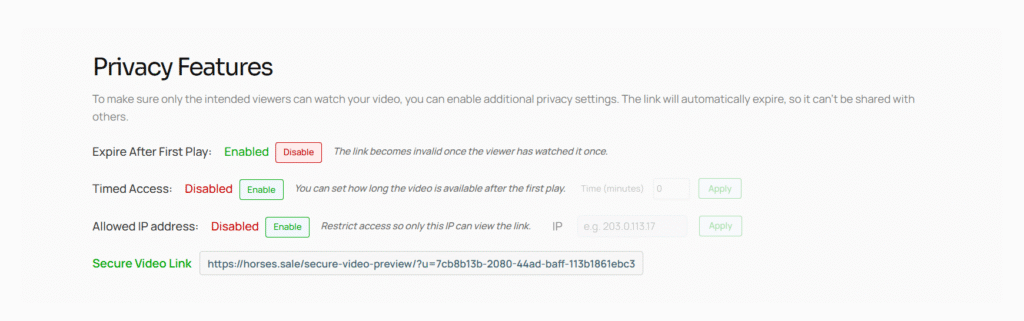
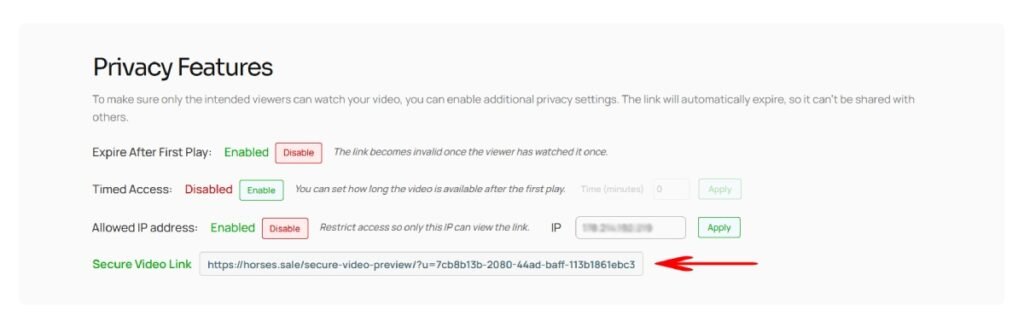
Each video in the HORSES.SALE Video Manager includes two types of sharing links — one for public sharing and another for secure, privacy-controlled access.

Step 1. Log in to your Seller Dashboard.

Step 2. Open the “My Video” section.

Step 3. Locate the video you want to share and click “Settings”.

Step 4a. In the Video Details section at the top of the page, you will find the public link. Copy this link to share your video freely on social media, via email, or anywhere else.

Step 4b. In the Privacy Features section, enable one or more privacy settings. After doing so, a secure link will appear below. This link includes your selected protection options and can be safely shared with specific recipients. For more information, see [Video Privacy Features].

Creating Photos

If you have a horse sales video but no photos, you can use the Frame Extractor tool in the HORSES.SALE Video Manager to create photos directly from your video. This feature allows you to capture still frames of your horse at any moment in the video.

While extracted frames are not a full replacement for professional photography, they can serve as a practical alternative when no photos are available. The quality of the generated images matches the original video quality and is typically higher than screenshots taken manually, which often suffer from compression or scaling issues.

Step 1. Log in to your Seller Dashboard. (create a free account if you don’t have one yet)

Step 2. Open the “My Videos” section.

Step 3. Upload your video. Read more about [uploading videos]

Step 4. Locate the video you want to share and click “Settings”.

Step 5. In the video player, pause the video at any time.

Step 6. Click the “Download frame” button, and the selected frame will be downloaded to your device as an image file. 

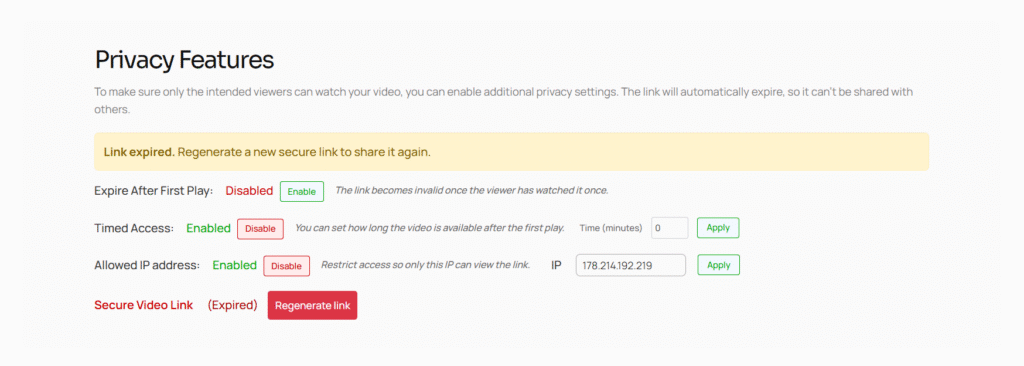
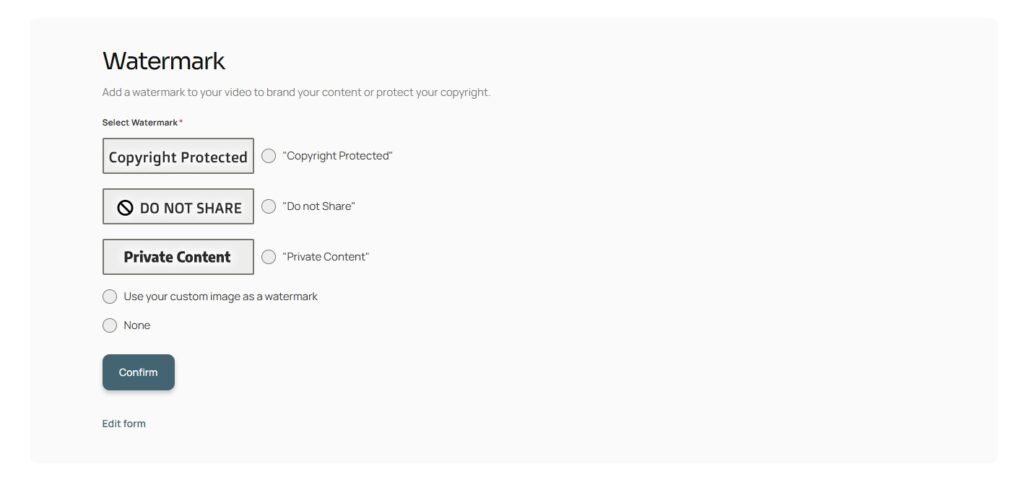
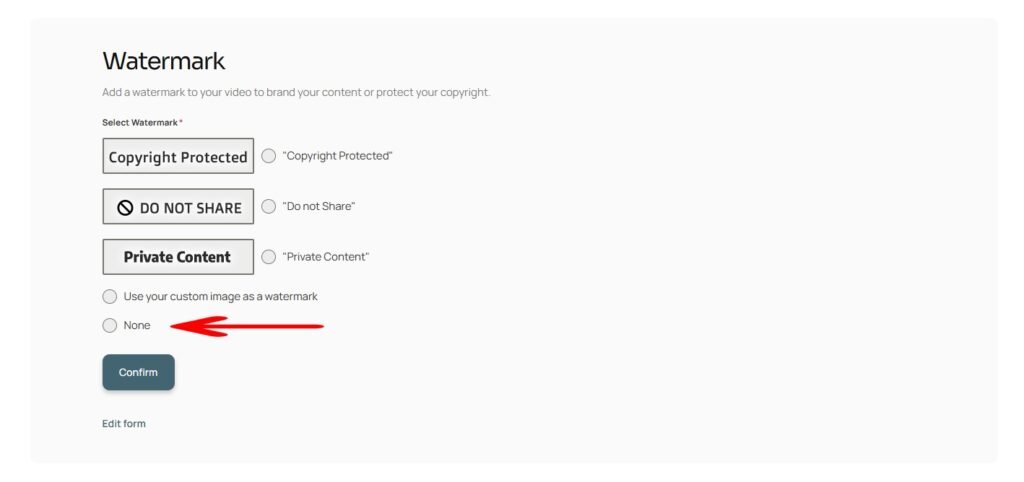
Extended Privacy Settings

The HORSES.SALE Video Manager allows you to apply privacy settings to protect your videos from unauthorized viewing. These settings ensure that your sales content is shared securely and viewed only under the conditions you choose.

There are three available privacy options:

Single View
The video link can be opened only once. After the first viewing, the link automatically expires, and the video cannot be accessed again from any device.

Time-Limited View
The video link remains active for a specific period defined by you. Once the selected duration expires, the link becomes inactive and the video can no longer be viewed.

IP Restriction
Access to the video is limited to a single specified IP address. The link will only open from that IP, preventing viewing from other locations or devices.

Step 1. Log in to your Seller Dashboard. (create a free account if you don’t have one yet)

Step 2. Open the “My videos” section.

Step 3. Upload your video. Read more about [uploading videos]

Step 4. Locate the video you want to share and click “Settings”.

Step 4. Select your privacy settings. If none of your privacy restrictions is active, the video link is not available.

Step 5. Activate one or two privacy features by clicking the “Enable” buttons. For the “Timed Access” option, set the number of minutes the link is available after the first view and click the “Apply” button. For the “Allowed IP address” option, specify the allowed IP address and click the “Apply” button.

Step 6. Copy the Secure Video Link and send it to the viewer.

Step 7. Once the link expires according to the conditions you’ve set, you will see the expiration notification. You can change your settings and create the new link by clicking the “Regenerate link” button.

Adding a Watermark

You can add a watermark to your video using the HORSES.SALE Video Manager. This feature allows you to protect your content from unauthorized use and to reinforce your personal or business branding.

Watermarks are applied automatically to the video during playback and cannot be removed or edited by viewers. This provides an additional layer of privacy protection while maintaining the professional appearance of your sales materials.

Step 1. Log in to your Seller Dashboard. (create a free account if you don’t have one yet)

Step 2. Open the “My videos” section.

Step 3. Upload your video. Read more about uploading videos

Step 4. Locate the video you want to share and click “Settings”.

Step 5. Select one of the privacy protection watermarks or upload your image, and click “Confirm“.

Step 6. Refresh the page to see the changes.

Step 7 (optional) . To remove the watermark, select the “None” option and click “Confirm”.

Blur Rider's Face (beta)

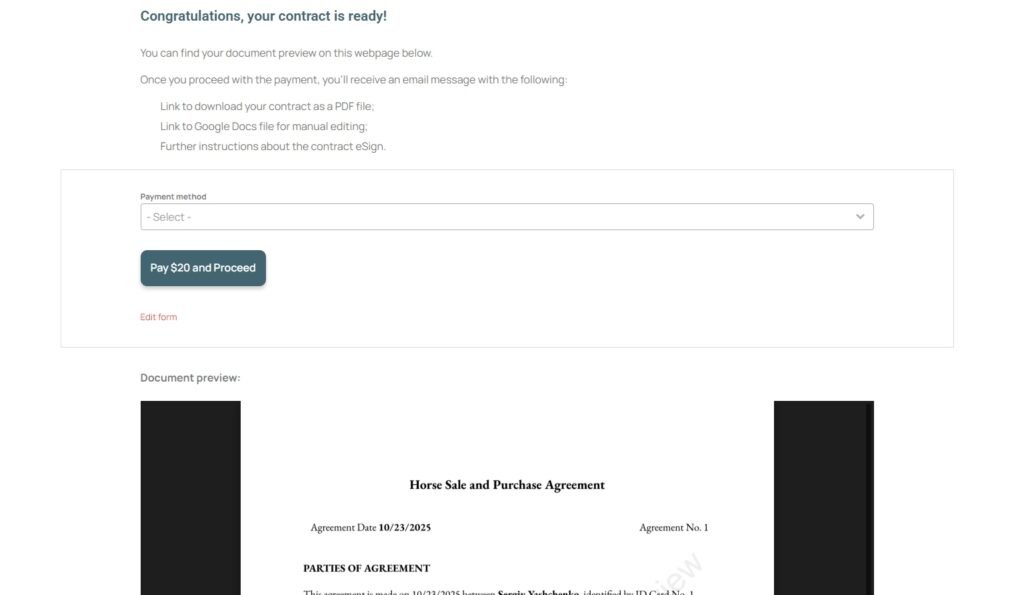
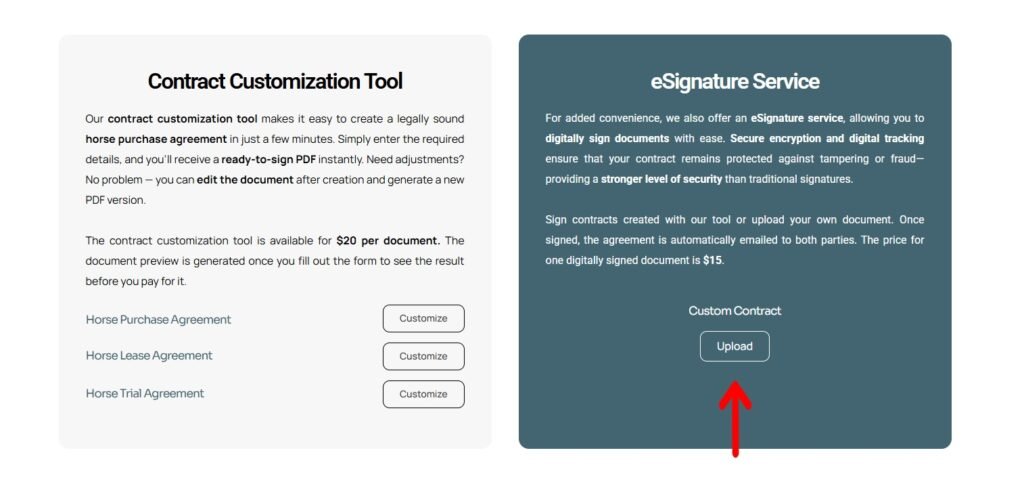
Selling a Horse: Docs Hub

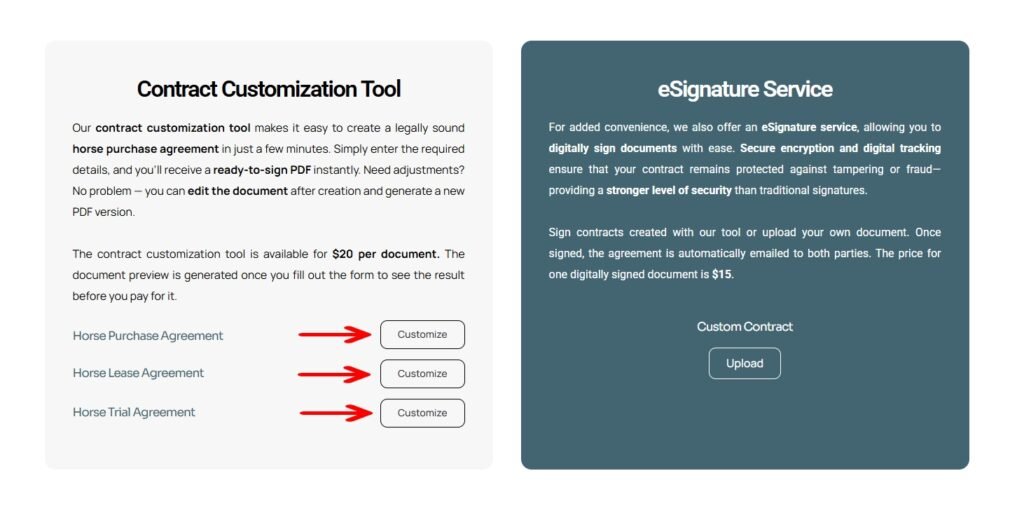
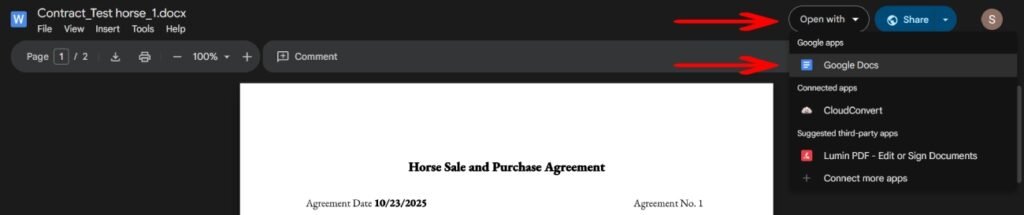
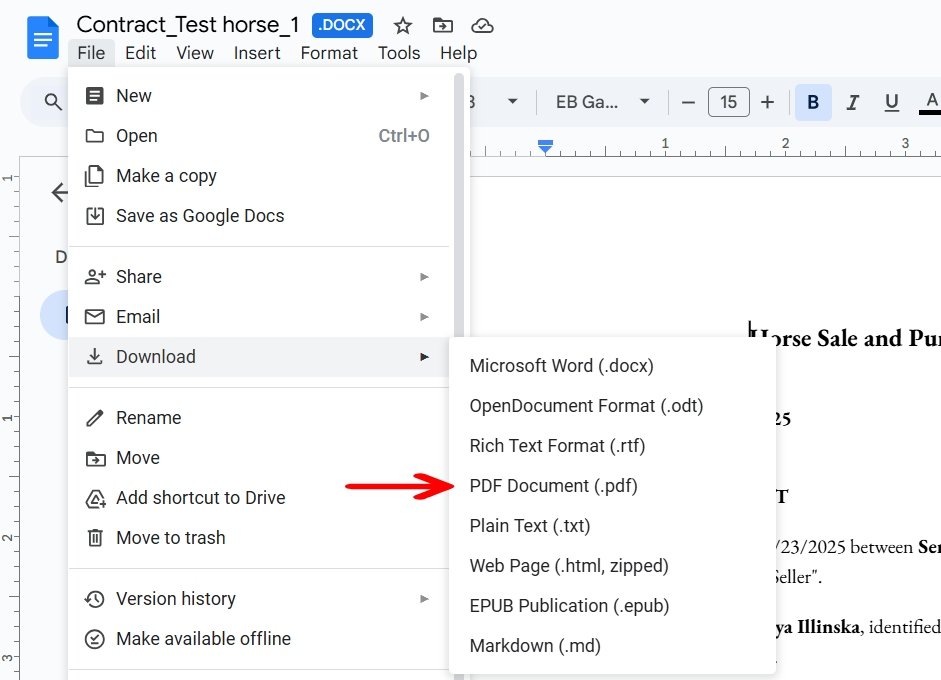
Customizing a Contract

HORSES.SALE Contract Customization Tool allows creating horse-related agreements, including purchase, lease, and trial, in minutes. 

Step 1. Select the type of contract: Purchase, Lease, or Trial.

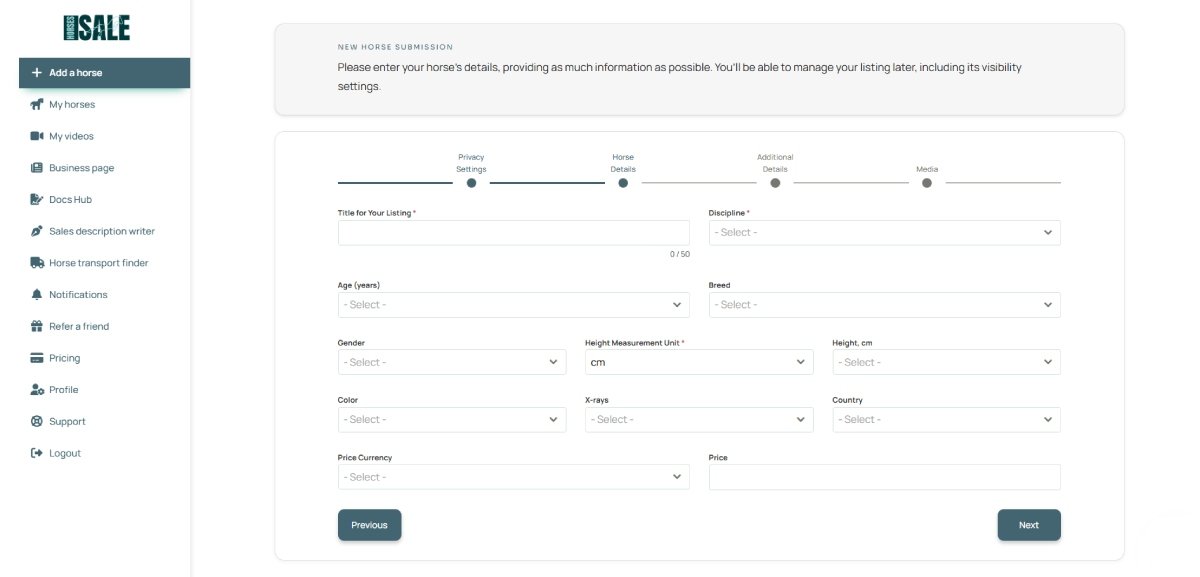
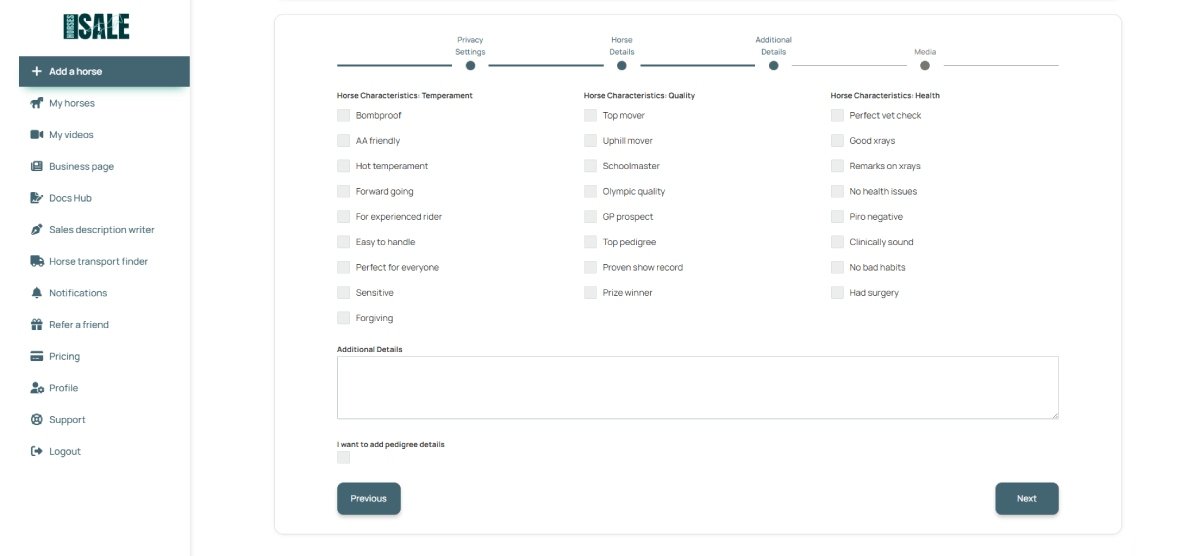
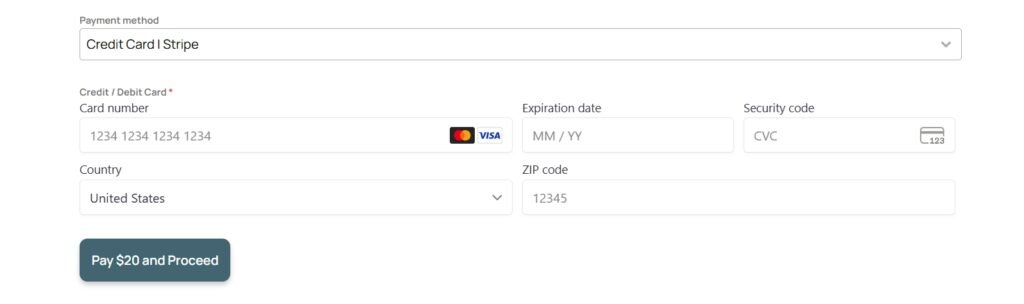
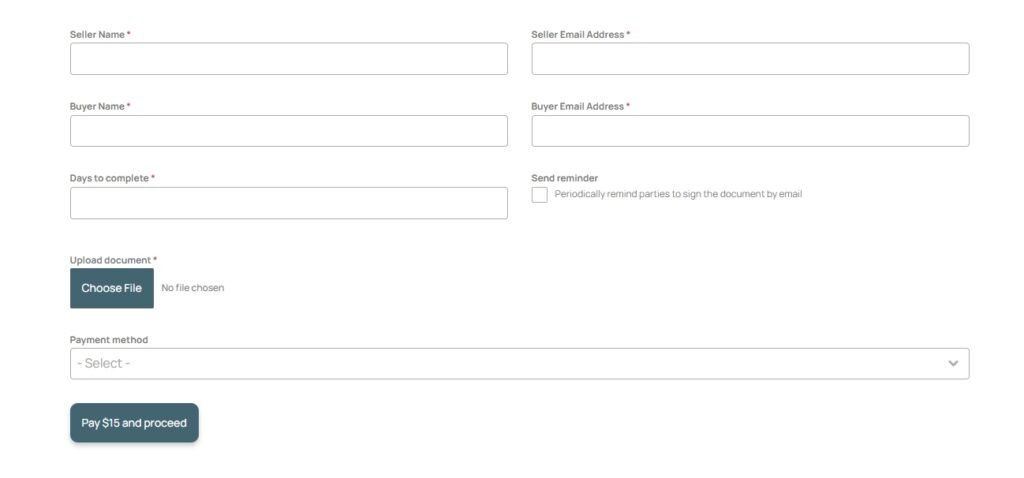
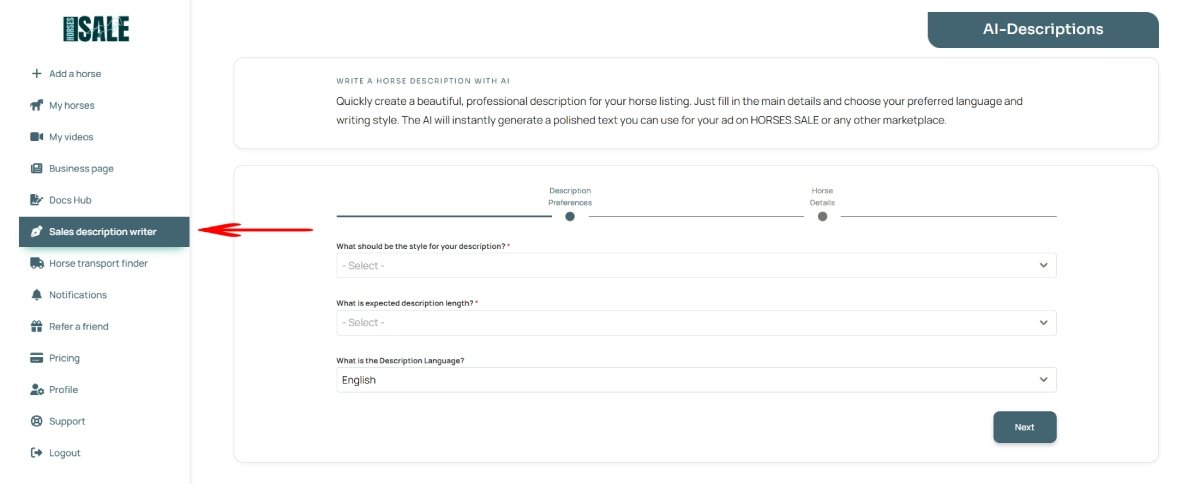
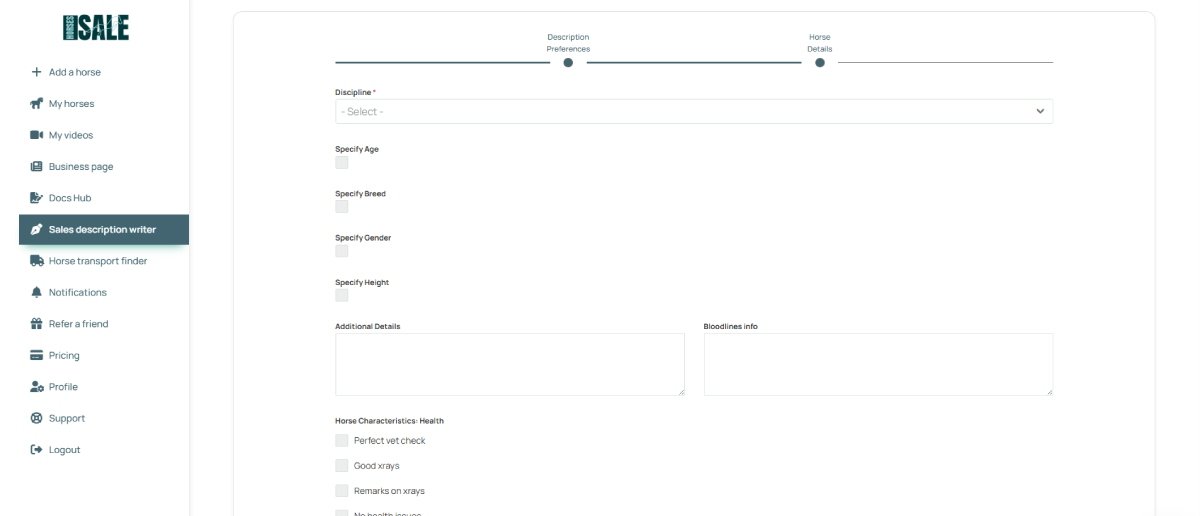
Step 2. Fill out the multi-step form.

Step 3. Once the form is submitted, you’ll be redirected to the agreement page, where you can find an embedded PDF document with HORSES.SALE watermark. If some minor changes to your agreement are required, no worries, you can add them later.

Step 4. Select the payment method and purchase the service.

Step 5. Check your mailbox. You will receive a link to a PDF file and also a Google Docs file with editing option. Download your PDF file or open Google Docs if some changes are required.

Step 6 (optional). If you need to edit your document, click the “File & Download PDF” button in the email, and then select the “Open with” – “Google Docs” option.

Step 7 (optional). Edit the document.

Step 8 (optional). Once all changes are made, click “File” – “Download” – PDF Document (or other format you prefer).

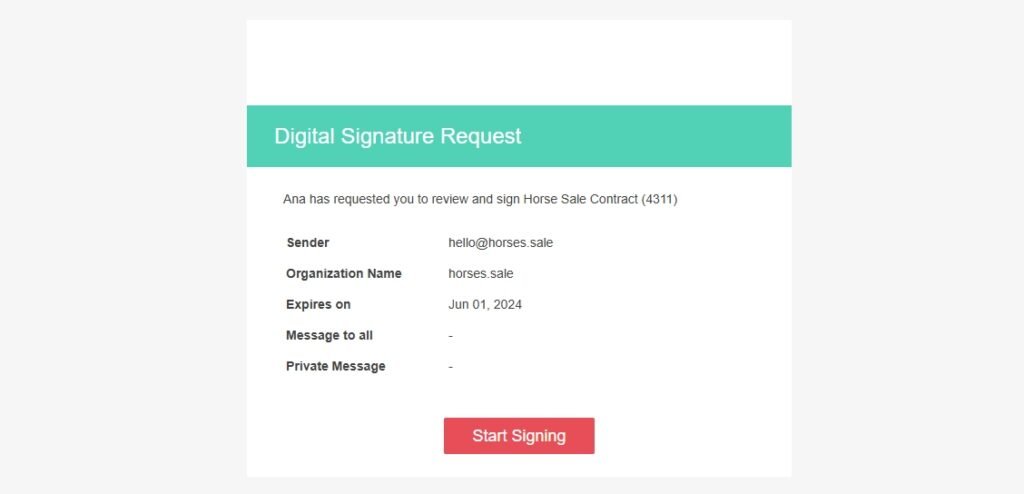
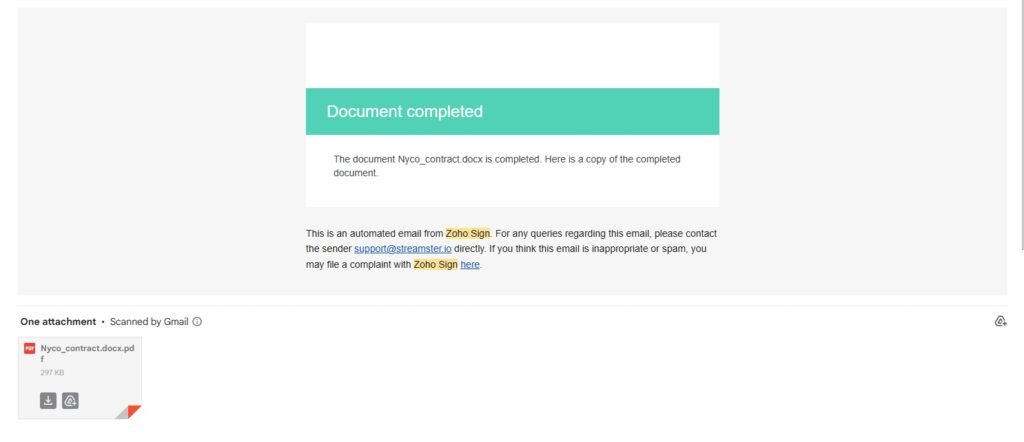
Using e-Signature Service

HORSES.SALE E-signature service allows both parties of the agreement to sign the document digitally. It ensures that the contract remains protected against tampering or fraud—providing a stronger level of security than traditional signatures.

Step 1. On the HORSES.SALE “Sign” page, click the “Upload” button. 

Step 2. Fill out the short form, upload your document and make the payment for the service.

Step 3. Within 24 hours, both parties to the contract will receive e-mails with a ready-to-sign document and instructions for signing.

Step 4. Once the document is signed by both parties, they will receive a signed contract by email.

Selling a Horse: Other Tools

Sales Description Writer

Our AI-based tool helps writing sales descriptions for the horses.

Step 1. Create a free seller’s account on HORSES.SALE

Step 2. Select the “Sales description writer” section and choose the main preferences of the description, including size, style, and language. 

Step 3. Provide some details about your horse and submit the form.

Step 4. Get your result instantly